
Why Writing in Science is More Than Just a Boring Task (And How to Make It Fun!)
Another day, another student asking, “Why are we writing so much in science?” 🤦♀️ Oh boy, do I feel you on this one! It’s like a never-ending loop. But here’s the thing: I remind my students over and over that writing in science is key to understanding the content. It’s not just busy work—trust me, there’s a method to the madness!
One of my goals as a teacher is to help you help your students collect, interpret, and draw conclusions from data. These are the skills they need not only in the classroom but in the real world. After all, how can we expect students to make informed decisions without knowing how to analyze data and think critically? And, yes, that includes scientific writing—it’s about connecting ideas, drawing conclusions, and becoming scientifically literate, whether that’s reading or writing science.
Key Takeaways
- Writing in science deepens understanding
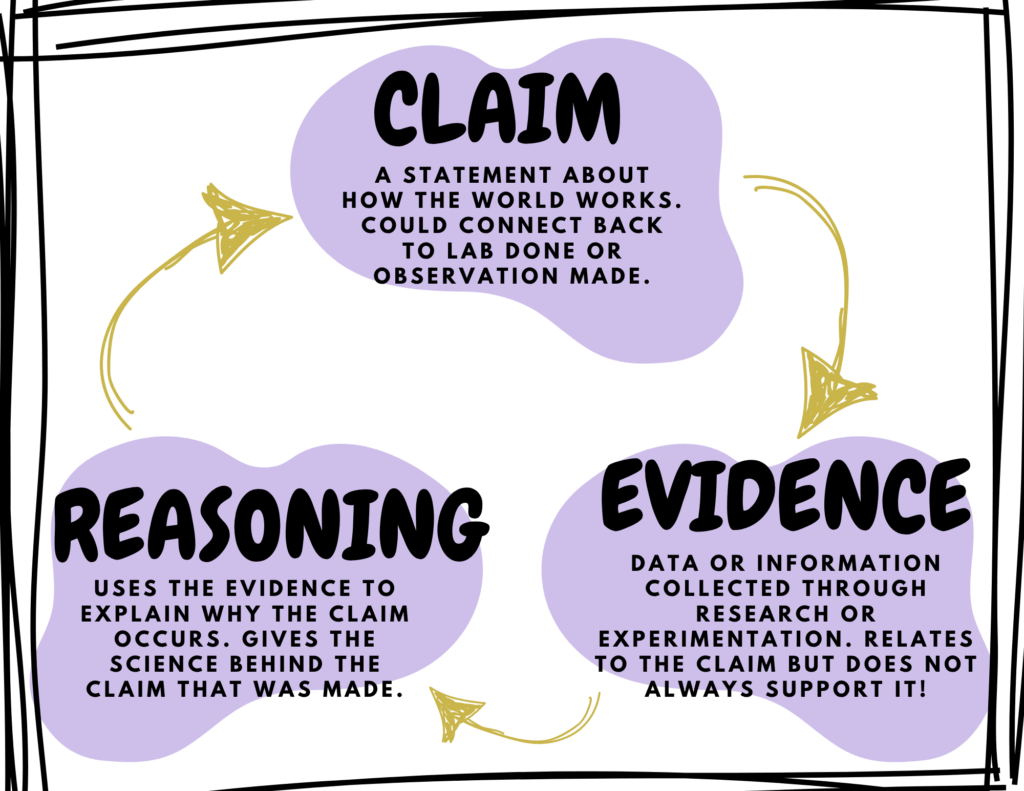
- Teaching the claim, evidence, reasoning format and providing organizers and visuals will further your students ability to write and process data
- It’s important to make this learning relevant and engaging for your students
Why We Teach Scientific Writing (and the Claim, Evidence, Reasoning Format)
You might be asking: Why do we focus on scientific writing and the “Claim, Evidence, Reasoning” format? Well, the short answer is: it helps students think critically, not just regurgitate information. It’s also a powerful tool for understanding how data connects to everyday life. 🌍 Plus, it gives them the ability to analyze data in a way that’s not just relevant for a lab, but also for things like evaluating news stories, consumer products, and, hey, maybe even that viral TikTok experiment.
First, Data—Then, Writing!
Before we can dive into conclusions, we need to analyze the data first. Think of it this way: if your students have a pile of raw data, they can’t just stare at it and hope it makes sense. That’s like having a puzzle with no instructions. 🧩 We need to do something with it!I always tell my students, “You’ve got to do something with your data!” A bunch of numbers and facts doesn’t help anyone draw conclusions. So, we break things down—averages, percentages, whatever we need to make sense of the numbers. Then, we take that data and turn it into something visual, like graphs. Once we have the graph, that’s when the fun begins!
Let’s Talk Graphs and Trends 📈
I give my students plenty of practice looking for trends and patterns in graphs. It’s like a quick “do-now” warm-up that gets them thinking critically. The cool part? You can tie the graph activity to whatever topic they’re currently studying. So not only do they get the practice, but it’s relevant to their learning!
Time to Write: Claim, Evidence, Reasoning (The Good Stuff)
Now, we’re ready to write a conclusion. Cue the Claim, Evidence, Reasoning format! I kick this off by talking about the lab we just did—what we expected, what actually happened, and why it’s important. We always start with the Claim. It’s a simple statement about what we observed. For example:
In a classic chemistry flame lab (you know, the one with Bunsen burners and colorful flames), we talk about electron movement and how it relates to the colors we see. The claim might look something like this:
“The more electron orbitals that an electron jumps, the more energy it releases, and the higher the wavelength and color emitted.”
Now, that’s a claim they can sink their teeth into!
Evidence: Choose Wisely, Young Scientist
Next up—Evidence. I tell my students they’ll need around three pieces of solid evidence. If they’re struggling, I have them bullet-point the evidence first. Once they’ve got that, they can choose which evidence best supports their claim.
Here’s the trick: students often mix up Evidence and Reasoning (it happens!). But it’s important to remind them that Evidence is the “what” and Reasoning is the “why.”
Reasoning: Let’s Get into the Science Behind It
Reasoning is where the magic happens. I tell students, “You need to explain why you got the results you got.” It’s not just about what happened; it’s about explaining why the data makes sense scientifically.
For example, in our flame lab:
“In this lab, we lit _______ in the Bunsen burner and saw colors X, Y, and Z. This element has X number of electrons and orbitals. When heated, the electrons absorbed energy and jumped to a higher orbital. Then, they quickly fell back to their ground state, releasing energy as light. The wavelength of that light corresponds to the color we saw.”Boom. That’s a solid example of combining Evidence and Reasoning—and your students are well on their way to mastering it.
Going Further: Error Sources, Real-World Connections & More
If you’re working with higher-level students, it’s time to go a little deeper. Let’s talk about sources of error (hint: it’s not “I measured wrong” 🙅♀️). We’re talking about things beyond their control, like room temperature fluctuations or equipment malfunctions. They need to explain how these errors could’ve affected their results.
Then, let’s connect everything to the real world. Why does this science matter? What can we apply this knowledge to? This is where you can challenge your students to think beyond the classroom and explore how their data ties into real-world issues.
Wrapping It Up: Writing Conclusions Takes Time (and Patience)
Writing conclusions isn’t a one-and-done task. It’s work—serious work! In the beginning, it can take students a week to complete, but that’s okay. The more practice they get, the quicker they’ll be able to write clear, concise, and well-supported conclusions. 🎯
If you’re looking for more tips on teaching these skills (and how to give constructive feedback that makes a difference), check out my other post on teaching strategies. And, if you need an outline to help students organize their conclusions, don’t forget to grab my freebie over on my TpT store!
Looking to have the CER poster for your classroom?
Grab the freebie on my TpT Store